Sunday, November 13, 2016
Tis the Season Shaker Card
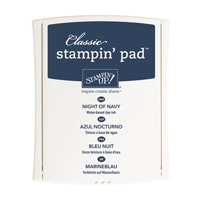
Shaker cards always take card giving to a new level for me. So unique and fun to make at the same time. I used to admire everyone else's then decided to take a leap and make my own. I had so much fun and loved the way it turned out its hard not to make all my cards a shaker card. When i saw how gorgeous the Detailed Santa thinlit die cutout was I knew I had to make a shaker card with him at least once.( I know Ill make more ;))I used White whisper card stock for the base and to cut the Santa out of. I colored in some with my Stampin markers Real Red, Flirty Flamingo from the new In Colors 2016- 2018, and Gold write marker, that is now retired but you can use the Wink of Stella gold for his glasses and it will look great.The sentiment is stamped in Night Of Navy and from the oh, what fun stamp set.The filling is Dazzling Diamonds and some snow flake confetti i punched out.The framing is from some Christmas washi tape I had on hand. Doesn't take long to assemble this fun card.The blue background is a piece from some winter scrapbook paper I had. You can use whatever suits your taste. Here is the list of supplies you will need to make this fun card!!
Product List
I had to get in one more before I moved on to another stamp and thinlit set..lol..this one was Pinterest inspired, I thought it was to pretty not to make my own.I love love Pinterest, so many ideas so little time in a day.
I used Real Red card stock for my base, then added a piece of the Red Glimmer paper and a strip of DSP Holidays fancy foil vellum.I cut my Santa from Whisper white card stock. Used my Greetings from Santa stamp set again, stamped on a 1 3/4" circle i punched out with Real Red ink pad.Used the smallest circle die from my Layering circles framelits, then glued my stamped circle on to that, then used a dimensional to stick it to the card, giving it a 3d look.I glued the Santa onto the red glimmer paper using the fine tip Glue pen. That glue pen is perfect for thin edges and small things.Added my strip of Foil Vellum and it was done.I stamped Merry Christmas on the inside with the retired Sassy Salutation stamp. Here is what you need to make this awesome card.
Product List
Ho Ho Ho!!!
Greetings from Santa! This bundle is so much fun, you can go from fun to elegant with just a few changes of embellishments and paper. This one I used for the base Early Espresso card stock. I then matte with whisper white card stock. I then used the Detailed Santa thinlits die to cut my gold foil paper for that cute Santa face. I had cut the gold foil in a square first of 3 3/4" X 3 3/4", that is what gave me the even border. Glued him to my whisper white square that was the same measurements as the gold foil.Then i cut another piece of gold and whisper white that measured 1 1/2" X 3 3/4". Used one of the line design thinlit from the same die set to cut the design in the white piece and then glued the gold underneath to show through the white and then stamped the sentiments from the Greetings from Santa stamp set. I had used some Dazzling Diamonds glitter to sparkle up the front inside edges of the face of the card.
On the inside I place another piece of Whisper white matte and then added a couple gold stars i cut out with the star die in the Santa thinlits. Then stamped the sentiment on the white with Early Espresso ink pad. Then WAHLAH,an elegant looking card.This is the inside of the card.
If you would like to make your own the supplies needed are listed below.
Product List
Subscribe to:
Posts (Atom)


